INSTRUCTIONS FOR WIFI ESL OPERATION
First, you need to check whether the battery is in good contact state after receiving our products. Because our products are shipped from China, the goods need to go through a long and tortuous transportation journey before being delivered to you. So we need to make sure that the product you receive is in the best possible condition before testing.
Second, if there are some scratches or marks on the surface of the product you received, please don't worry, the product has not been damaged. Because there will be a protective film on the surface of the product, just tear it off before use. If the product received is really damaged, please contact us in time, take pictures and videos of the product and send them to us. If the product is damaged in transit, we will resend the goods or refund the money.
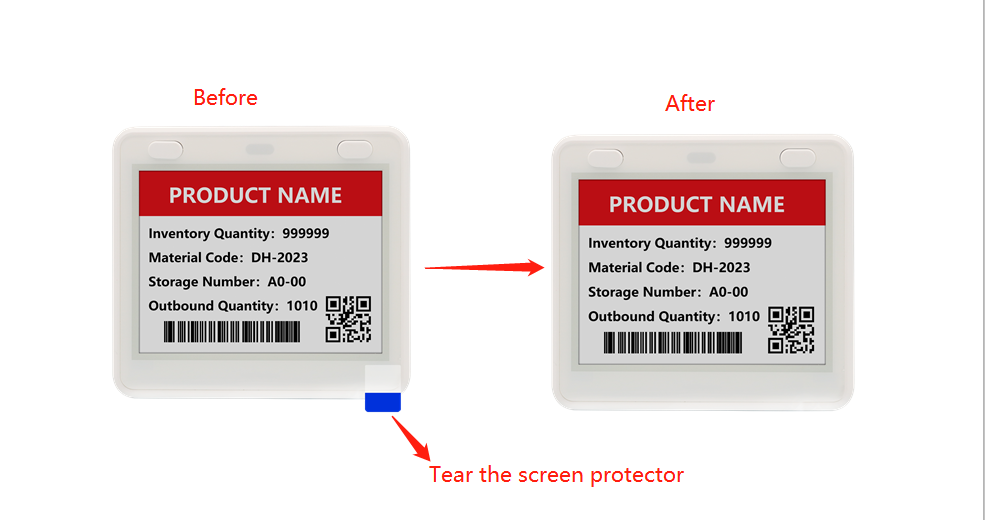
Third, if your product is ready for testing, congratulations. You can follow the instructions below for product testing.
1.Parameter Configuration
1.1 Obtain the following information from the manufacturer:
① Login address (MQTT address)
② Operation account and password (apply to the manufacturer in advance)
③ API KEY(which bound to the operation account)
1.2 Install the WiFi configuration tool "Wifi-Tools".
The computer needs to be Windows system and have WiFi function.Need to turn on the WiFi function before other operation.(Obtain the WiFi tool installation package from the manufacturer.)
1.3. Enter the parameter setting mode
First press the side button (7.5 "on the front), the green light will be steady on (keep the button pressed), then push the thimble against the small hole next to the USB on the back of the device (single trigger), wait for the green light to blink, then release the button.If the blue indicator blinks slowly, the device enters AP mode and enters the system parameter setting mode.The blue light blinks faster, indicating that the computer's WIFI is successfully connected to the AP of the device. After a few seconds, the light will automatically turn off.
For details, please see the video:
1.4 Set the WiFi label parameters
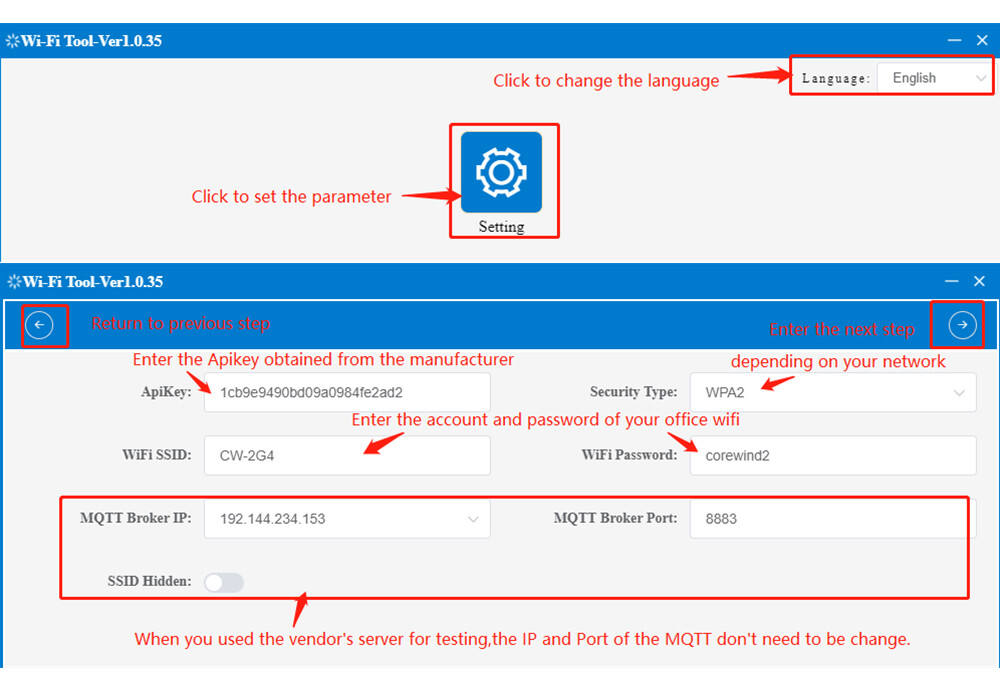
① Open the WiFi-tools , fill in the correct parameters, and click "→" button after filling in the parameters to enter the next step:
② Click the "Start" button to search for devices. Device information will be displayed if the search succeeds
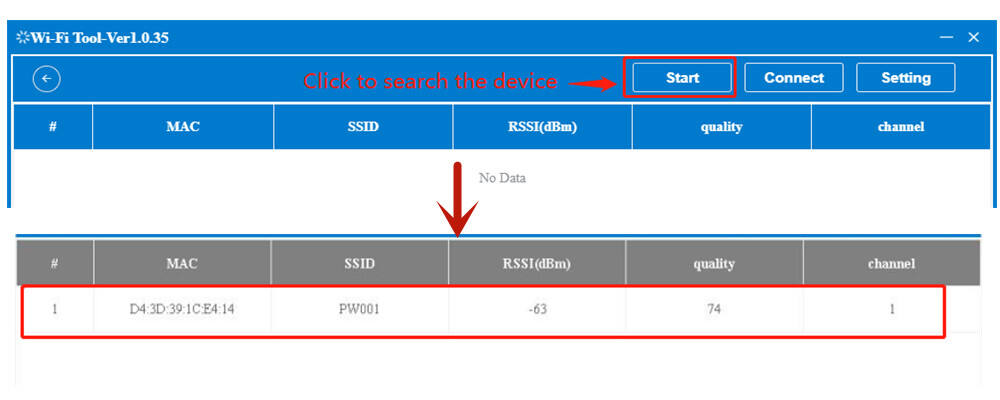
③ Click the "Connect" button to connect the device; After the connection is successful, the blue indicator changes from slow blinking to fast blinking, and the AP status shows "connected".
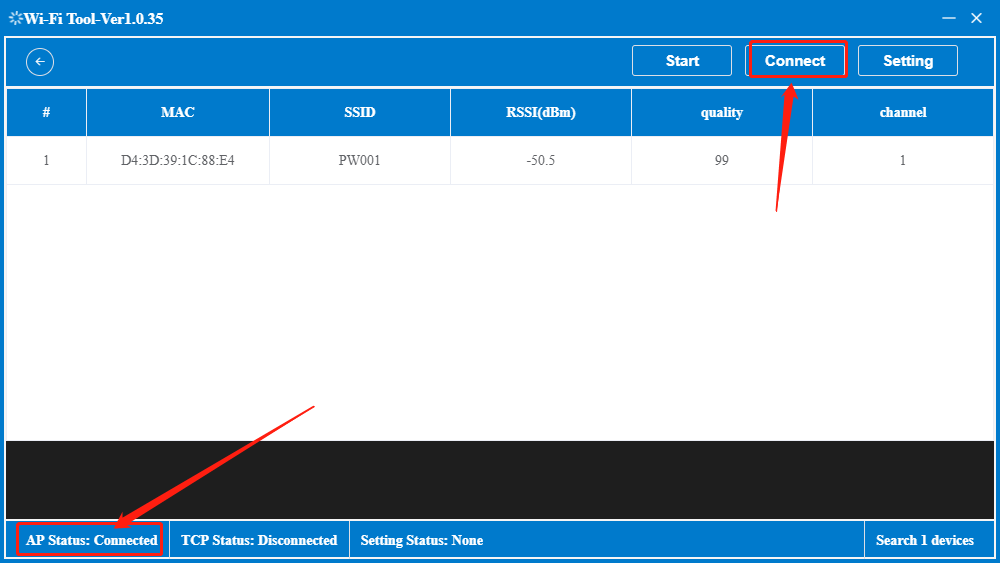
④ Click "Setting". If the message "Tag setting success" is displayed, the setting is complete.
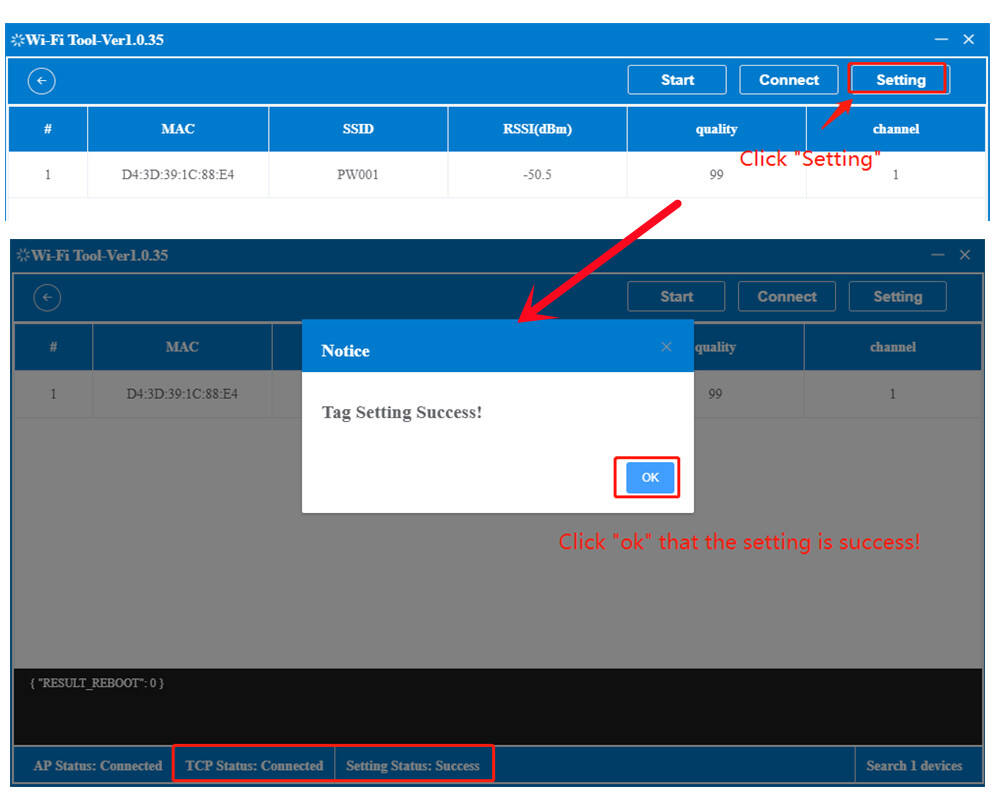
⑤ After the setting is successful, the indicator on the label blinks from blue to red. When the blinking stops, the label connects to WiFi successfully.
For details, please see the video:
2. WiFi Tags operation process
2.1 Log in to the management system
① Open the computer browser (Google Chrome is recommended)
② Login website: http://192.144.234.153:8000/ (Login account and password Apply to the vendor.)
After successful login, the home page is displayed.
2.2 Update the info of tags
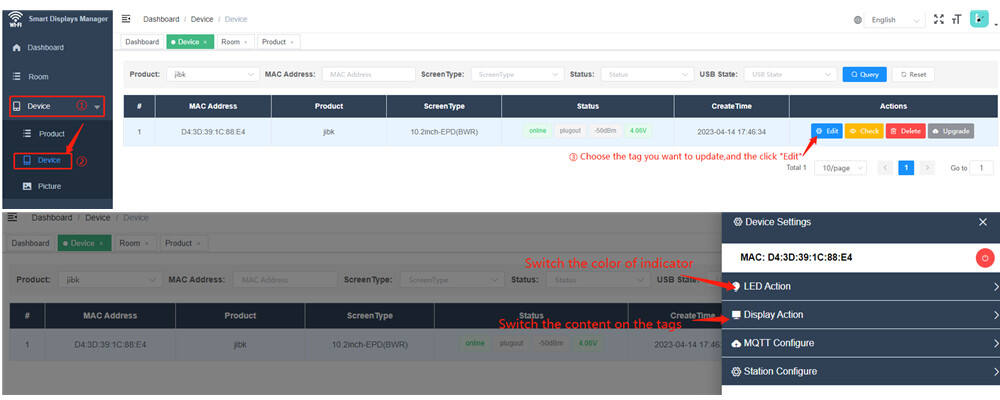
① Click "Device"→ click "Edit" to enter the page for quickly change the info on the tags.
② “LED Action”: Quickly change the indicator color of tag; “Display Action”: Quickly change the contents of tag.
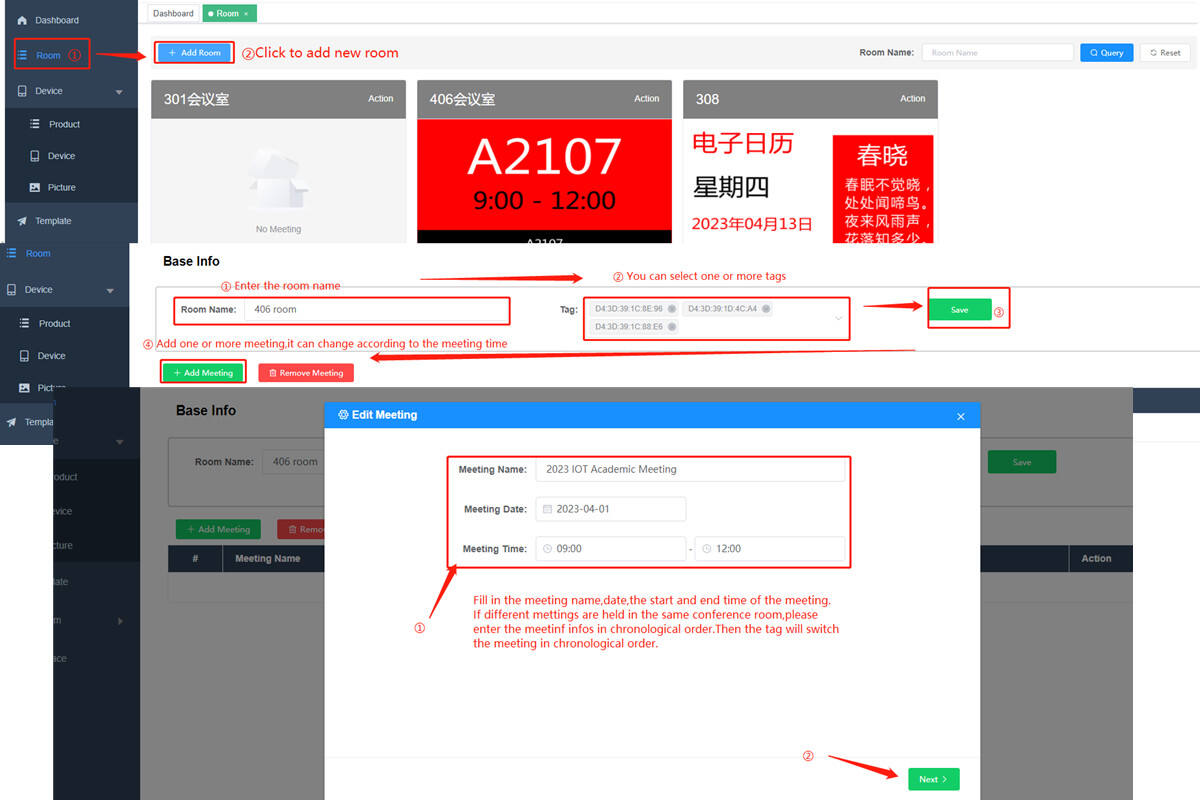
2.3 Create a new conference room
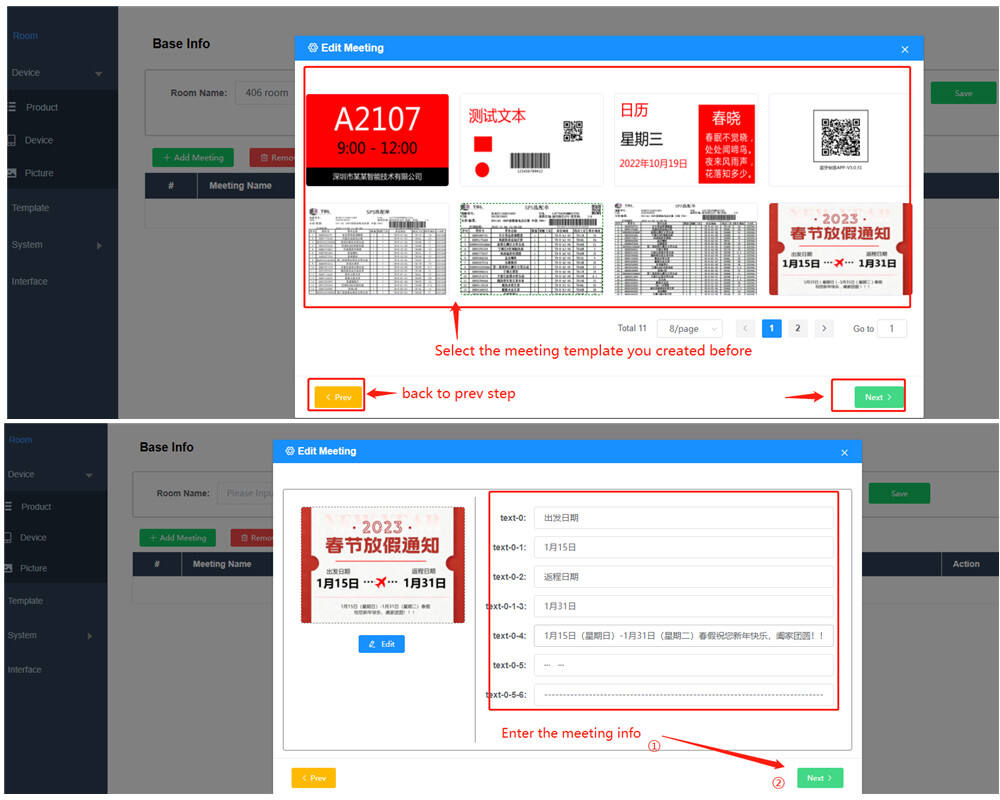
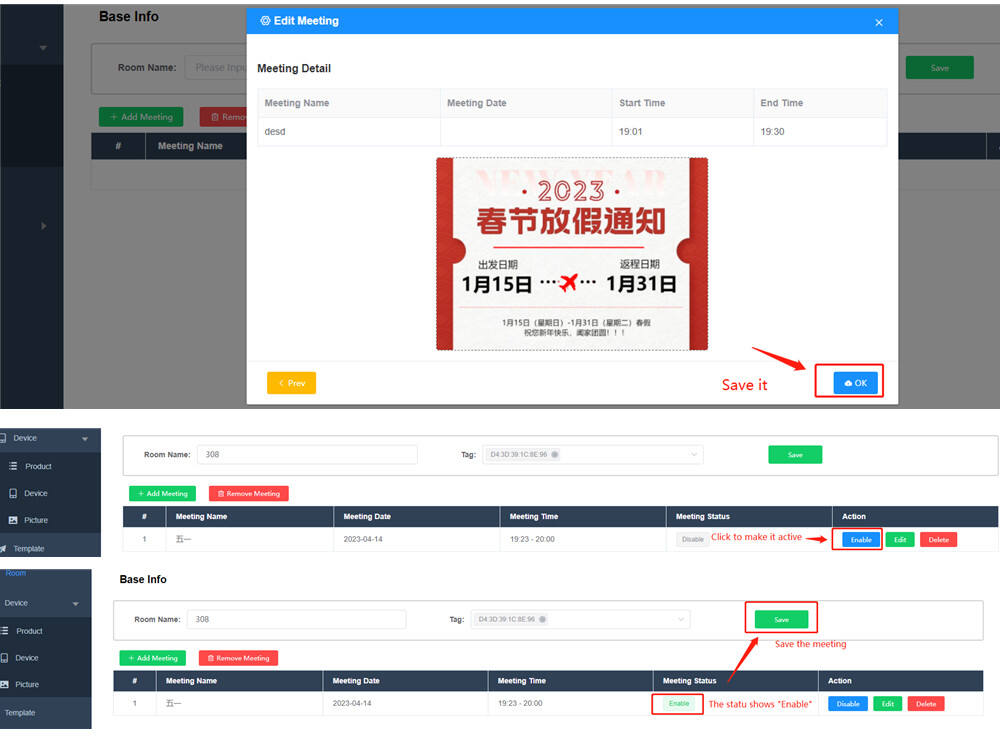
① Click "+Add Room" to create a new meeting room and select the Tag. Then create a meeting, select the template, enter the meeting content and time, and save the meeting.
② Click "Enable" to make the meeting status active,and save it.
③ All meetings will be displayed on the tag in the chronological order you set.
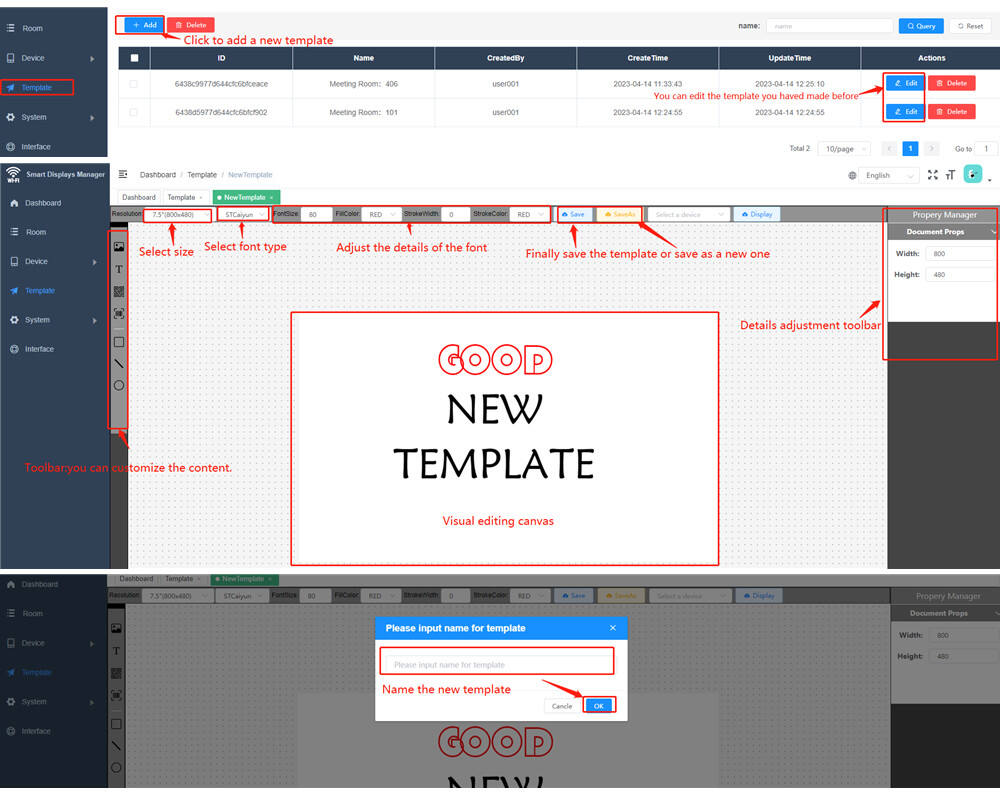
2.3 Create a new template
① Click "+Add" to create a new display template
② Add what you want according to your idea and save the template
For more details please refer to the follow video:
3. Contact the manufacturer to obtain the API protocol
4. For customers using the V5 WiFi service controller and WiFi ESL server software, contact the manufacturer to obtain the manual
